
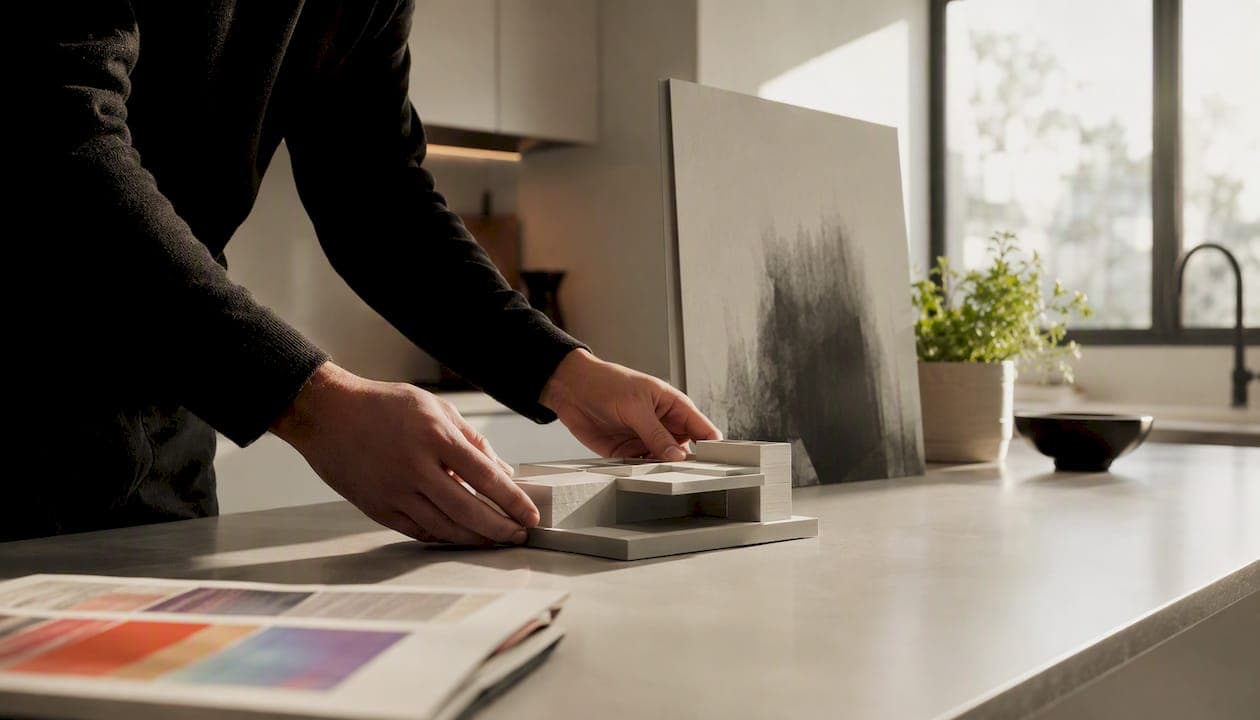
3D product rendering converts a 3D model into a photorealistic 2D image (or interactive asset) ready for your product page, ad campaign, or retailer portal. No physical sample required. For ecommerce teams, that means you can publish a hero shot before the first unit ships.
When to choose rendering over photography:
- You need multiple colorways or configurations without reshooting
- Your product isn't manufactured yet but you have CAD files
- You're managing 50+ SKUs and a photo studio would blow the budget
Quick cost and time expectation: Professional renders typically cost hundreds of dollars per image, with turnaround times spanning one to two weeks for a basic hero shot, and longer durations for larger batches or animations.
First deliverable to commission: Start with one white-background hero packshot plus a 360-degree turntable. That combination covers your PDP, retailer requirements, and gives you a quality benchmark before you scale.
Immediate checklist for your team:
- Locate or create your CAD file (STEP, STP, or OBJ preferred)
- Document your brand color specs in Pantone or exact hex/RGB values
- Define the output size and file format your PDP platform requires (typically 2000×2000 px PNG or TIFF)
Pro Tip: If you don't have a CAD file, a high-resolution reference photo set (front, back, side, 45-degree angle) plus a physical sample sent to the studio is a workable starting point. CAD is faster and more accurate, but it's not always a hard requirement.
Table of Contents
- What 3D product rendering actually is (and how it differs from modeling and photography)
- The step-by-step production workflow from CAD to final render
- What types of renders you should commission and what files to expect
- Which software should you use for product rendering?
- Quality checklist before you publish your renders
- How to decide between DIY, a freelancer, and a full-service studio
- How a strategic production partner integrates 3D rendering into campaigns
- Key Takeaways
- The mistake most teams make before they even brief a studio
- MINIM delivers renders as part of campaigns, not as a side project
- Useful sources for further reading
What 3D product rendering actually is (and how it differs from modeling and photography)
3D product rendering is the process of generating a photorealistic image from a 3D scene. A render engine calculates how light interacts with surfaces, materials, and geometry to produce a final pixel output. The result looks like a photograph but was never shot with a camera.
It's worth separating three terms that get conflated constantly:
| Term | What it produces | Primary tool | Typical deliverable |
|---|---|---|---|
| 3D modeling | A digital geometry object | Blender, SolidWorks, Rhino | .OBJ, .FBX, .STEP file |
| 3D product rendering | A photoreal 2D image or interactive asset | KeyShot, Blender Cycles, Substance 3D | PNG, TIFF, EXR, GLB |
| Product photography | A photograph of a physical object | Camera, lighting rig, studio | JPEG, RAW, TIFF |
Modeling is the foundation. Rendering is what turns that foundation into a marketing asset. Photography captures reality; rendering constructs it.
For ecommerce teams, the business case comes down to three things. First, conversion: photoreal renders on a product detail page (PDP) perform on par with photography when executed well, and Shopify's 3D ecommerce resources document how 3D and AR assets on product pages lift buyer confidence and reduce return rates. Second, variant management: once a base model and material library exist, producing a new colorway takes hours rather than days of reshooting. Third, scale: a photo studio charges per day and per setup; a render pipeline charges per asset, and the marginal cost of the 50th SKU is far lower than the first.
The step-by-step production workflow from CAD to final render
Production follows a consistent sequence whether you're running it in-house or briefing a studio. Here's how it breaks down:
-
Discovery and brief. Define the deliverables, target platforms, color specs, and reference imagery. Agree on file formats in and out before any work starts.
-
Model and CAD preparation. Import your CAD file (STEP, STP, IGES, OBJ, or FBX are the most common inputs). Clean up geometry: remove internal components that won't be visible, check for inverted normals, and repair any gaps in the mesh. KeyShot Studio supports 34+ native CAD formats and preserves geometry integrity through LiveLinking, which means design updates in your CAD tool propagate to the render scene without a full reimport.
-
UV unwrapping and texturing. Lay out UV maps so textures apply correctly across the surface. For simple products, auto-UV works; for complex geometry with labels or printed graphics, manual unwrapping is worth the time.
-
Materials and PBR setup. Apply physically based rendering (PBR) materials: base color, roughness, metalness, normal maps, and opacity. This stage determines whether your product looks like plastic, brushed aluminum, matte rubber, or glass. Adobe Substance 3D is the industry standard for authoring these material libraries, and consistent PBR assets cut color proof cycles significantly.
-
Lighting and scene setup. Place HDRI environment maps or studio light rigs. For white-background catalog shots, a three-point light setup with a neutral HDRI is standard. For lifestyle scenes, match the ambient light to the environment you're compositing into.
-
Camera choice and framing. Set focal length (50–85mm equivalent is most natural for product work), camera height, and angle. Lock camera positions for consistency across SKUs.
-
Render passes and output. Run the final render at target resolution. Export separate passes (beauty, shadow, reflection, AO) as EXR files when post-production work is planned. For web-ready assets, TIFF or high-quality PNG are standard outputs.
-
Post-production and color proofing. Composite passes in Photoshop or After Effects, adjust exposure and white balance, and run a color proof against your physical sample or Pantone reference. This is the step most teams skip and then regret.
Pro Tip: Before sending CAD files to a studio, strip out internal components (fasteners, circuit boards, internal structure) that will never be visible in the final render. A cleaner model reduces prep time and lowers your invoice. Also, always provide your Pantone or RAL color codes alongside any reference images — "matches the website" is not a color spec.
What types of renders you should commission and what files to expect
Different marketing channels need different render types. Here's a practical map of what to order and what formats to expect back:
| Deliverable | Recommended format | Typical resolution | Primary use case |
|---|---|---|---|
| White-background hero packshot | PNG (transparent BG) or TIFF | 2000×2000 px minimum | PDP, Amazon, retailer portals |
| Lifestyle / environment scene | JPEG or TIFF | 2000×2000 px | Social ads, brand campaigns, email |
| 360-degree turntable (sprite sheet) | PNG sequence or WebP sprite | — | PDP interactive viewer, Shopify 3D |
| Product animation / reveal | MP4 or ProRes | 1920×1080 or 4K | Social video, paid ads, landing pages |
| AR-ready asset | glTF / GLB or USDZ | N/A (polygon budget matters) | iOS AR Quick Look, Android Scene Viewer |
| Print / catalog | TIFF or EXR | 300 DPI at print size | Printed catalogs, trade show materials |
Shopify's guidance on 3D ecommerce recommends GLB for Android and USDZ for iOS AR experiences, and those two formats now cover the vast majority of mobile AR use cases. For animated product reveals that feed into short-form social content, a fast video production workflow can take your render output and cut it into platform-ready ads quickly.
Variant management is where render pipelines pay off fastest. Once you have a base model with a clean material setup, swapping a colorway means changing one material node, not booking a new studio day. A product with eight colorways and three angles produces 24 images from a single model. That's the math that makes rendering cheaper than photography at catalog scale.
Which software should you use for product rendering?
The honest answer: it depends on where your files come from and how much technical overhead your team can absorb. KeyShot is the default choice for CAD-native product teams. Adobe Substance 3D leads on material authoring. Blender is the free, full-featured option that rewards patience. Vizcom is built for early-stage ideation, not final production renders.
| Tool | Best for | CAD / file-format support | Price / licensing | Learning curve | Render quality | Realtime vs offline |
|---|---|---|---|---|---|---|
| KeyShot | CAD-native product studios | 34+ native CAD formats (STEP, SolidWorks, CATIA, etc.) | Subscription; Pro tier required for advanced features | Low to moderate | Photorealistic, physically based | Real-time ray-trace preview |
| Adobe Substance 3D | Material authoring and AR/web export | OBJ, FBX, glTF; limited native CAD | Creative Cloud subscription | Moderate | High; best for material-heavy products | Real-time viewport + offline render |
| Blender | Free/open pipelines, batch automation | OBJ, FBX, STL, glTF; CAD via add-ons | Free, open source | High | Studio-grade with Cycles or EEVEE | Both (EEVEE = real-time; Cycles = offline) |
| Vizcom | Sketch-to-render ideation | Sketch input; limited CAD | Subscription | Very low | Concept-level; not production-ready | Near-instant AI render |
For beginners running a small catalog without CAD files, Blender is the free starting point. The learning curve is real, but the community documentation is extensive and there's no licensing cost. Tools like Revedra package studio-grade product rendering workflows inside Blender, including batch turntables and automated GLB exports, which cuts setup time considerably.
For in-house pro teams with CAD files, KeyShot's CAD-native pipeline is the most efficient path. The LiveLink connection between your CAD tool and KeyShot means a design revision doesn't require a full reimport and re-setup.
For enterprise or agency pipelines that need material consistency across hundreds of SKUs, pairing KeyShot (rendering) with Adobe Substance 3D (material authoring) is the industry-standard combination. Substance handles the PBR material library; KeyShot handles the final output.
Browser-based options like Neexis Render and Onshape Render Studio are worth knowing about for teams without render workstations. Neexis claims renders in under a minute at 4K by abstracting UV and material setup through AI. Onshape Render Studio supports cloud renders up to 100 MP directly inside the CAD platform. Neither replaces a full studio pipeline for hero-level commercial work, but both are practical for rapid iteration and internal approvals.
- Beginner / self-serve: — Blender (free) or Neexis Render (browser-based, minimal setup)
- Enterprise / agency: — KeyShot + Adobe Substance 3D as a paired pipeline
Quality checklist before you publish your renders
Publishing a render that doesn't match the physical product is worse than publishing nothing. Here's the QA sequence that prevents that:
Material and color accuracy:
- Compare final render against a physical sample under a D65 (daylight) light source
- Verify Pantone or RAL codes were used, not approximated from a reference photo
- Check metallic and glossy surfaces for correct reflection behavior (no blown-out highlights)
Camera and composition:
- Confirm all SKUs use identical camera position, focal length, and crop ratio
- Verify shadow and contact shadow are consistent across the set (no floating products)
- Check that product proportions match engineering drawings, not just "look right"
Resolution and file specs:
- Web PDP: 2000×2000 px minimum, sRGB color profile, PNG or JPEG at 85–95% quality
- Print: 300 DPI at final print dimensions, CMYK or TIFF with embedded ICC profile
- Social ads: platform-specific specs (Meta recommends 1080×1080 px for feed; 1080×1920 px for Stories)
Pro Tip: Build a physical-to-digital color proof into your approval process before final render. Send a low-resolution draft render to your engineering or product team alongside the Pantone spec sheet. Catching a material mismatch at draft stage costs an hour; catching it after 200 renders are delivered costs a project.
Pro Tip: Use a physically based material library (Adobe Substance 3D's library, for example) rather than custom-painted textures for standard materials like aluminum, ABS plastic, or glass. Library materials are calibrated to real-world light behavior, which means fewer revision cycles and more consistent results across different render engines.
Publication specs summary:
- Web: PNG or JPEG, sRGB, 72–96 DPI screen resolution, 2000 px on the long edge minimum
- Social: platform-native specs; always export at 2x and downsize rather than rendering small
- Print: TIFF, CMYK, 300 DPI, embedded ICC profile (Fogra39 for European offset; SWOP for US)
- AR: GLB under 15 MB for web AR; USDZ under 20 MB for iOS Quick Look
How to decide between DIY, a freelancer, and a full-service studio
The sensible default: small catalogs (under 10 SKUs) or early-stage brands with tight budgets are well-served by a skilled freelancer. Large SKU counts, campaign-level creative, or work that needs to integrate with video and media production belongs with a full-service studio.
Questions to ask any studio or freelancer before you sign:
- What CAD or file formats do you accept, and what prep work is included in your quote?
- Who owns the source files (the .KSP, .BLEND, or scene file) after delivery?
- How many revision rounds are included, and what's the hourly rate beyond that?
- What's your color proofing process, and do you require a physical sample?
- What's the approval cadence, and who is the single point of contact?
- Can you deliver GLB/USDZ for AR alongside standard image outputs?
RFP brief template (copy and fill in):
- Product name and category
- CAD files available: Yes / No / In progress (format: ___)
- Target deliverables: hero packshot / 360 / lifestyle / animation / AR
- Number of SKUs and colorways
- Brand color specs: Pantone / RAL / hex values
- Required output formats and resolutions
- Target platforms: PDP / Amazon / social / print / AR
- Approval stakeholders and decision timeline
- Hard deadline for first delivery
- Budget range (optional but speeds quoting)
DIY vs. freelancer vs. studio at a glance:
- DIY (Blender, Neexis Render): Best for teams with 3D skills in-house, tight budgets, and flexible timelines. Expect a steep learning curve and slower output until the pipeline is established.
- Freelancer: Best for defined, repeatable deliverables (catalog packshots, 360s) where you can provide clean CAD files and clear specs. Rates vary widely; vet portfolios carefully for photorealism.
- Full-service studio: Best when rendering is one component of a larger campaign that includes video, animation, and media. A studio handles creative direction, QA, and asset management so your team doesn't have to.
For teams planning to animate renders into short-form ads, working with a partner who understands both commercial animation and rendering pipelines avoids the handoff friction that kills timelines.
How a strategic production partner integrates 3D rendering into campaigns
For integrated campaigns, rendering is rarely a standalone deliverable. It feeds hero images to the PDP, frames to the video edit, and assets to the media buyer. A production partner that coordinates all of those streams prevents the version-control chaos that happens when three vendors are working from different source files.
MINIM operates as that integrated partner for agencies and brand teams. The workflow looks like this:
- Creative strategy and brief: MINIM aligns on deliverables, platforms, and brand constraints before any production starts, so renders are built to spec for every downstream use.
- Asset production and QA: 3D renders, photography, and video are produced under a single creative direction, which means lighting, color, and composition are consistent across every format.
- Approval cadence: Structured review rounds with clear stakeholders prevent the open-ended revision loops that inflate timelines and cost.
- Handoff to PIM/CMS: Final assets are delivered in the formats and folder structure your platform requires, with naming conventions that map to your SKU taxonomy.
You can see how that integration plays out across campaign work in MINIM's portfolio. The production capabilities span creative strategy, 3D visual effects, photography, film, and brand design, which means renders don't have to be commissioned separately from the rest of the campaign.
Client expectations when working with a full-service partner:
- A single point of contact who manages vendor coordination and approval routing
- Milestone-based delivery (model approval, material proof, final render, post-production sign-off)
- Source files retained and organized for future SKU additions or campaign updates
- Asset handoff in PIM-ready format with resolution variants for every target platform
Key Takeaways
3D product rendering produces photoreal images from 3D models, and for ecommerce teams managing multiple SKUs or pre-production launches, it consistently outperforms traditional photography on cost, speed, and variant flexibility.
| Point | Details |
|---|---|
| Start with CAD and color specs | Clean CAD files (STEP, OBJ) and exact Pantone/RAL codes are the two inputs that most determine render quality and revision count. |
| Commission hero packshot + 360 first | A white-background hero and a 360 turntable cover PDP, retailer, and AR requirements from a single model. |
| Cost range: $100–$5,000 per image | Standard renders start at $100 per image for simple items and can reach $5,000 for complex studio scenes or animation. |
| Match the tool to your pipeline | KeyShot for CAD-native teams, Blender for free/batch pipelines, Adobe Substance 3D for material authoring, Vizcom for early ideation. |
| MINIM for integrated campaigns | MINIM coordinates 3D rendering with video, photography, and media as a single production partner, delivering consistent assets across every channel. |
The mistake most teams make before they even brief a studio
The most expensive mistake in a render project isn't the wrong software or the wrong studio. It's a bad brief.
Teams show up with a reference photo, a vague color description ("kind of a warm gray"), and no CAD file. The studio spends two weeks modeling from scratch, the color proof comes back wrong because no one provided a Pantone code, and the revision window is already closed because the campaign launch is in three days. That sequence is not rare. It's the norm for first-time render buyers.
The fix is upstream: treat the brief as a production document, not a conversation starter. Specify the CAD format, the exact color references, the number of angles, the output resolution, and the approval stakeholders before the studio starts. A well-specified brief doesn't just protect your timeline. It protects your budget, because revision rounds are where projects go over cost.
The second mistake is treating rendering as a one-time deliverable rather than a reusable asset. The source scene file, the material library, the camera presets — those are worth more than the first batch of renders. If your studio retains them and you don't, you'll pay full model-prep cost again for every future update. Always negotiate source file ownership upfront.
MINIM delivers renders as part of campaigns, not as a side project
Most render studios hand you files and walk away. MINIM integrates 3D assets into the full campaign: the hero render feeds the PDP, the animation feeds the paid social cut, the AR asset feeds the product page viewer, and all of it ships under a single creative direction with consistent color, lighting, and composition.
For agencies managing multi-SKU launches or brands that need renders to work alongside video and photography, that integration removes the version-control friction that comes from briefing three separate vendors. MINIM's production services cover creative strategy, 3D visual effects, film, and photography, so your renders and your campaign assets are built from the same source of truth.
Ready to commission your first render or scale an existing pipeline? Send MINIM a brief and get a production plan back within 48 hours.
Useful sources for further reading
- KeyShot Studio
- 3D Rendering and AI Visualization Software
- Product visualization in 3D: Bring your product to life
- blender.org
- Vizcom | Turn Sketches into Full-Fidelity 3D Renders, Instantly
- Neexis Render: AI 3D Rendering in the Browser | KeyShot & Vizcom Alternative
- Render Studio — Onshape
- The Cost of Renderings: A Complete Guide to 3D Rendering Pricing (2026)
- Revedra — Studio-grade product rendering, inside Blender
- shopify.com
Recommended
- Our Services | Enhance Your Brand Today — MINIM | Content Production Company
- Outsourcing Video Production: A Guide for Marketing Teams
- Our Services (Copy) | Elevate Your Brand Today - Explore Our Services — MINIM | Content Production Company
- Work | Elevate Your Content — Get Started Today — MINIM | Content Production Company